Creating a Connect Link
Last updated: July 30, 2026
Connect Links are the fastest way to bring a customer's device onto Texture. Share a link, the customer signs in to their manufacturer account and grants access, and their device shows up in your Texture workspace.
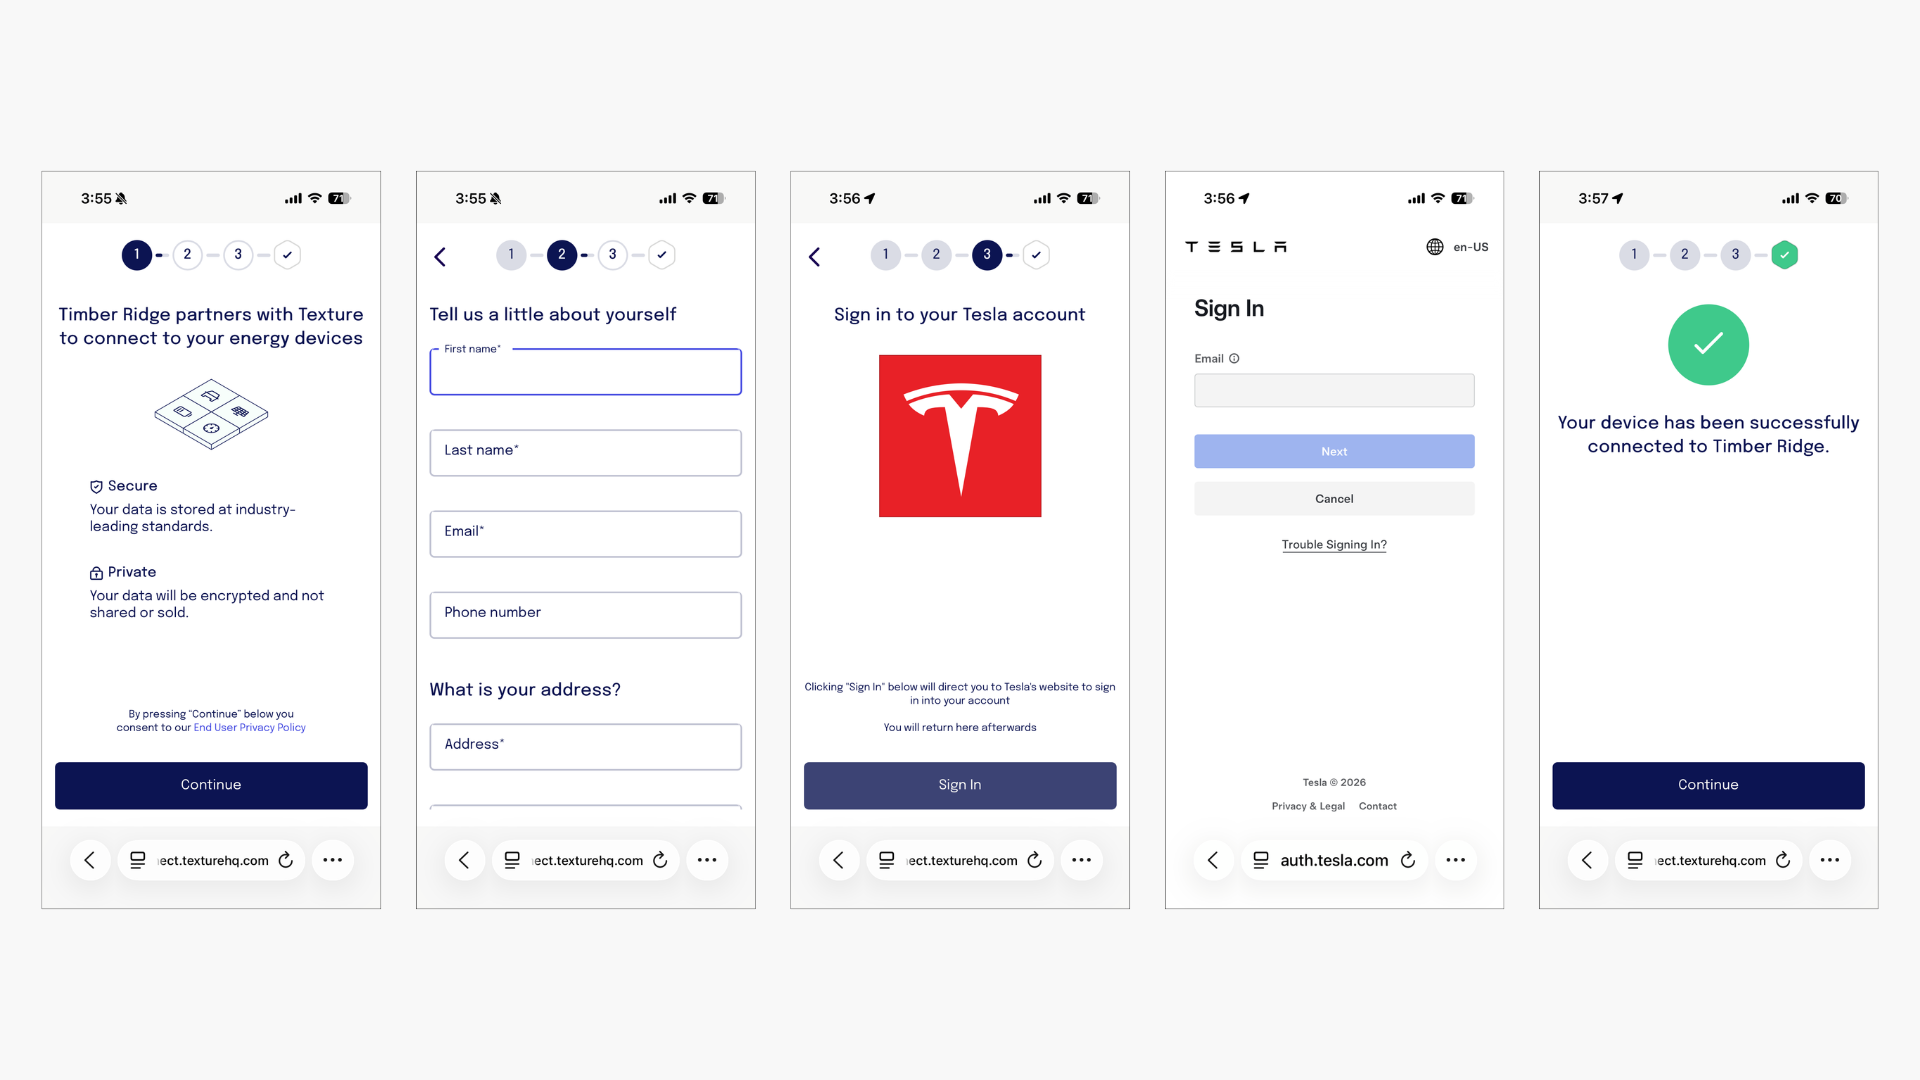
This article covers creating a Connect Link from the Texture dashboard. If you're building your own in-app or in-product flow instead, see the Texture Connect developer docs for the SDK, API, and headless integration options.
Option 1 — From the Connect page
Choose the right workspace. Use your sandbox workspace for testing, or production once you're ready to onboard real customers.
Open Connect. In the left navigation, select Connect, then click Connect Link.
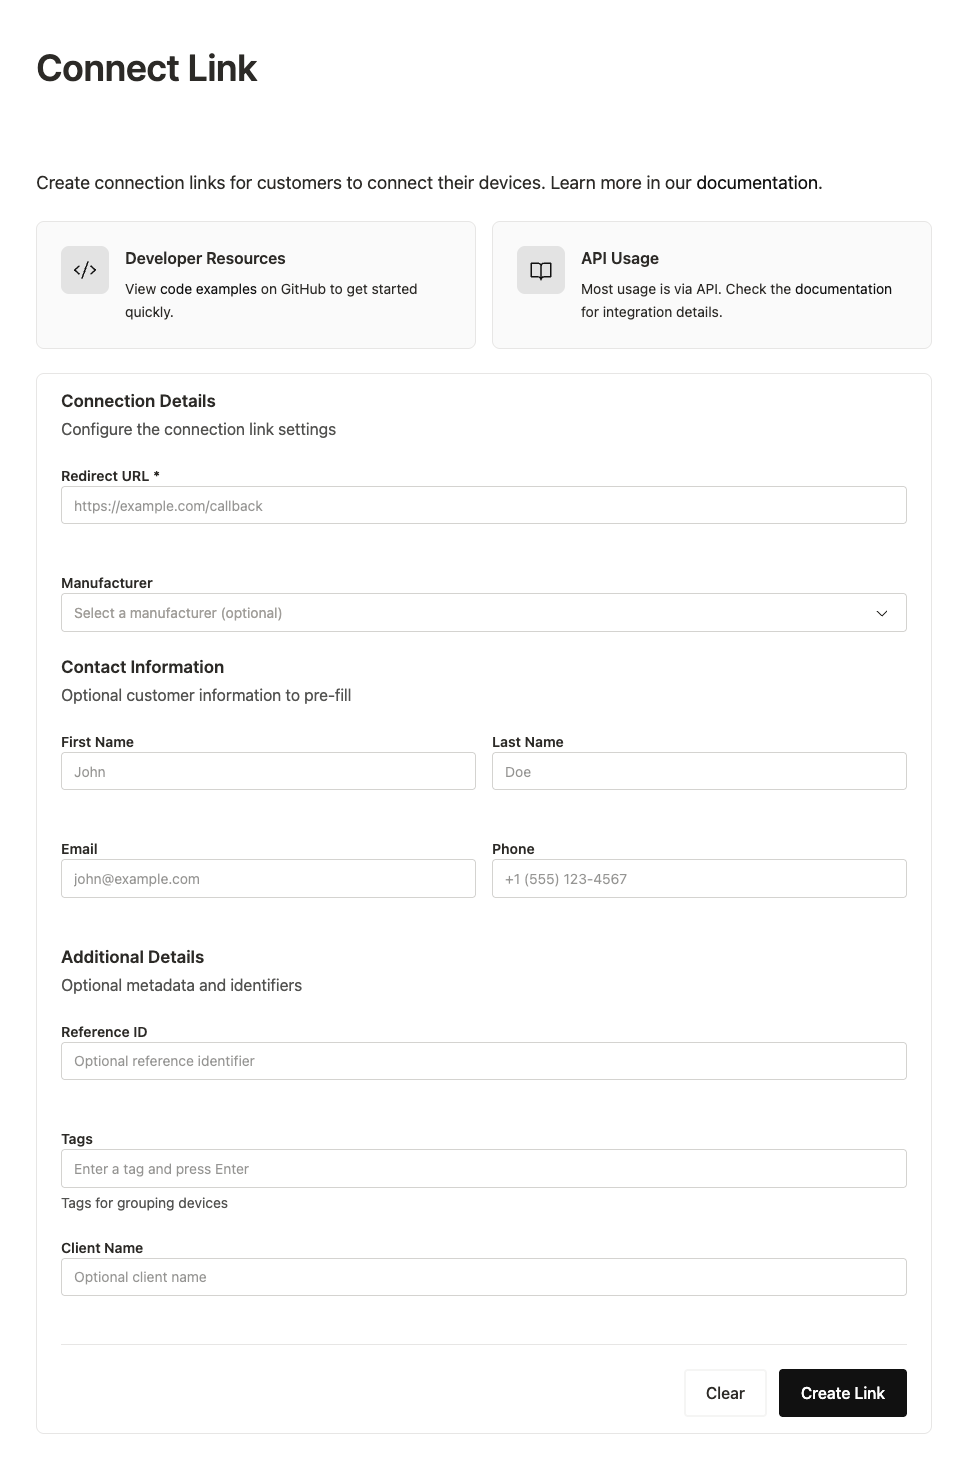
Set the redirect URL. This is where the customer lands after finishing the flow — typically your website or an incentive page.
Narrow the manufacturer (optional). Restrict the link to one manufacturer so the customer skips the manufacturer picker and goes straight to that login screen — useful if you already know which OEM the customer has.
Pre-fill customer information (optional). Add the customer's name, email, phone, or address if you already have it on file. Pre-filling saves them a step; leave it blank and they'll enter it themselves during the flow.
Add a reference ID (optional). Enter your own identifier for this customer — an account number or CRM ID — so you can match the connection back to your system later.
Set your client name. This is the name the customer sees during the flow. It defaults to your organization's name if you leave it blank.
Click Create. Texture generates a unique link for this customer.
Copy the link and send it to the customer. Paste it into an email, text message, or wherever you reach them.
Option 2 — From an existing contact record
Use this when the customer already has a Contact record in Texture — for example, they were uploaded through a bulk import or connected before. Texture pulls their name, email, and site details from the existing record, so you only need to supply two fields.
Open the contact's record. Find the customer in Contacts and open their record.
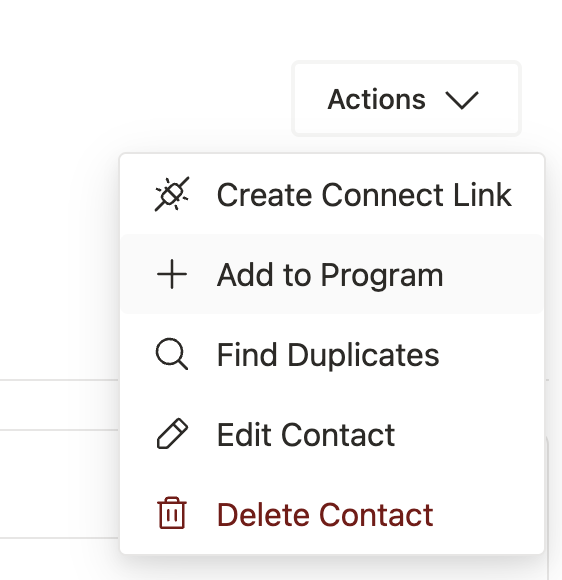
Click Actions, then Create Connect Link. This opens a short version of the Connect Link form.
Set the redirect URL. Same as above — where the customer lands once they've finished connecting a device.
Choose the manufacturer. Select the OEM the customer's device is with, so they're sent straight to that login screen.
Click Create, then copy and send the link. Texture pre-populates the customer and site information from the records already linked to this contact — there's nothing else to fill in.
IMPORTANT Save the link as soon as you create it Texture shows a new Connect Link only once, right after you click Create. If you navigate away before copying it, it won't be shown again — you'll need to create a new link to send to that customer. |
Connect Link fields
The dashboard form covers the fields most teams need day to day:
Field | Description |
|---|---|
Redirect URL | Where the customer is sent after completing the flow. A web page or a mobile deep link. |
Manufacturer | Optional. Restricts the flow to one OEM, skipping the manufacturer picker. |
Customer info | Optional. Name, email, phone, and address, used to pre-fill the flow for the customer. |
Reference ID | Optional. Your own identifier for this customer, for matching the connection to your system. |
Client name | The company name shown to the customer during the flow. Defaults to your organization's name. |
Building against the API or SDK directly unlocks additional options — tags, linking to an existing customer or site by ID, and headless mode for a fully white-labeled flow. See the full field reference in the Texture Connect docs.
Good to know
One link, one customer. Connect Links are unique per contact. Sending the same link to multiple people merges their devices into a single customer record instead of creating separate ones — create a new link for each person.
Links expire after 60 days. Unused links stop working after 60 days and can't be extended — create a new one instead.
Pre-filled links create records right away. If you pre-fill customer info, Texture creates the Contact and Site records as soon as the link is created. Without pre-filled data, those records aren't created until the customer completes the flow themselves.
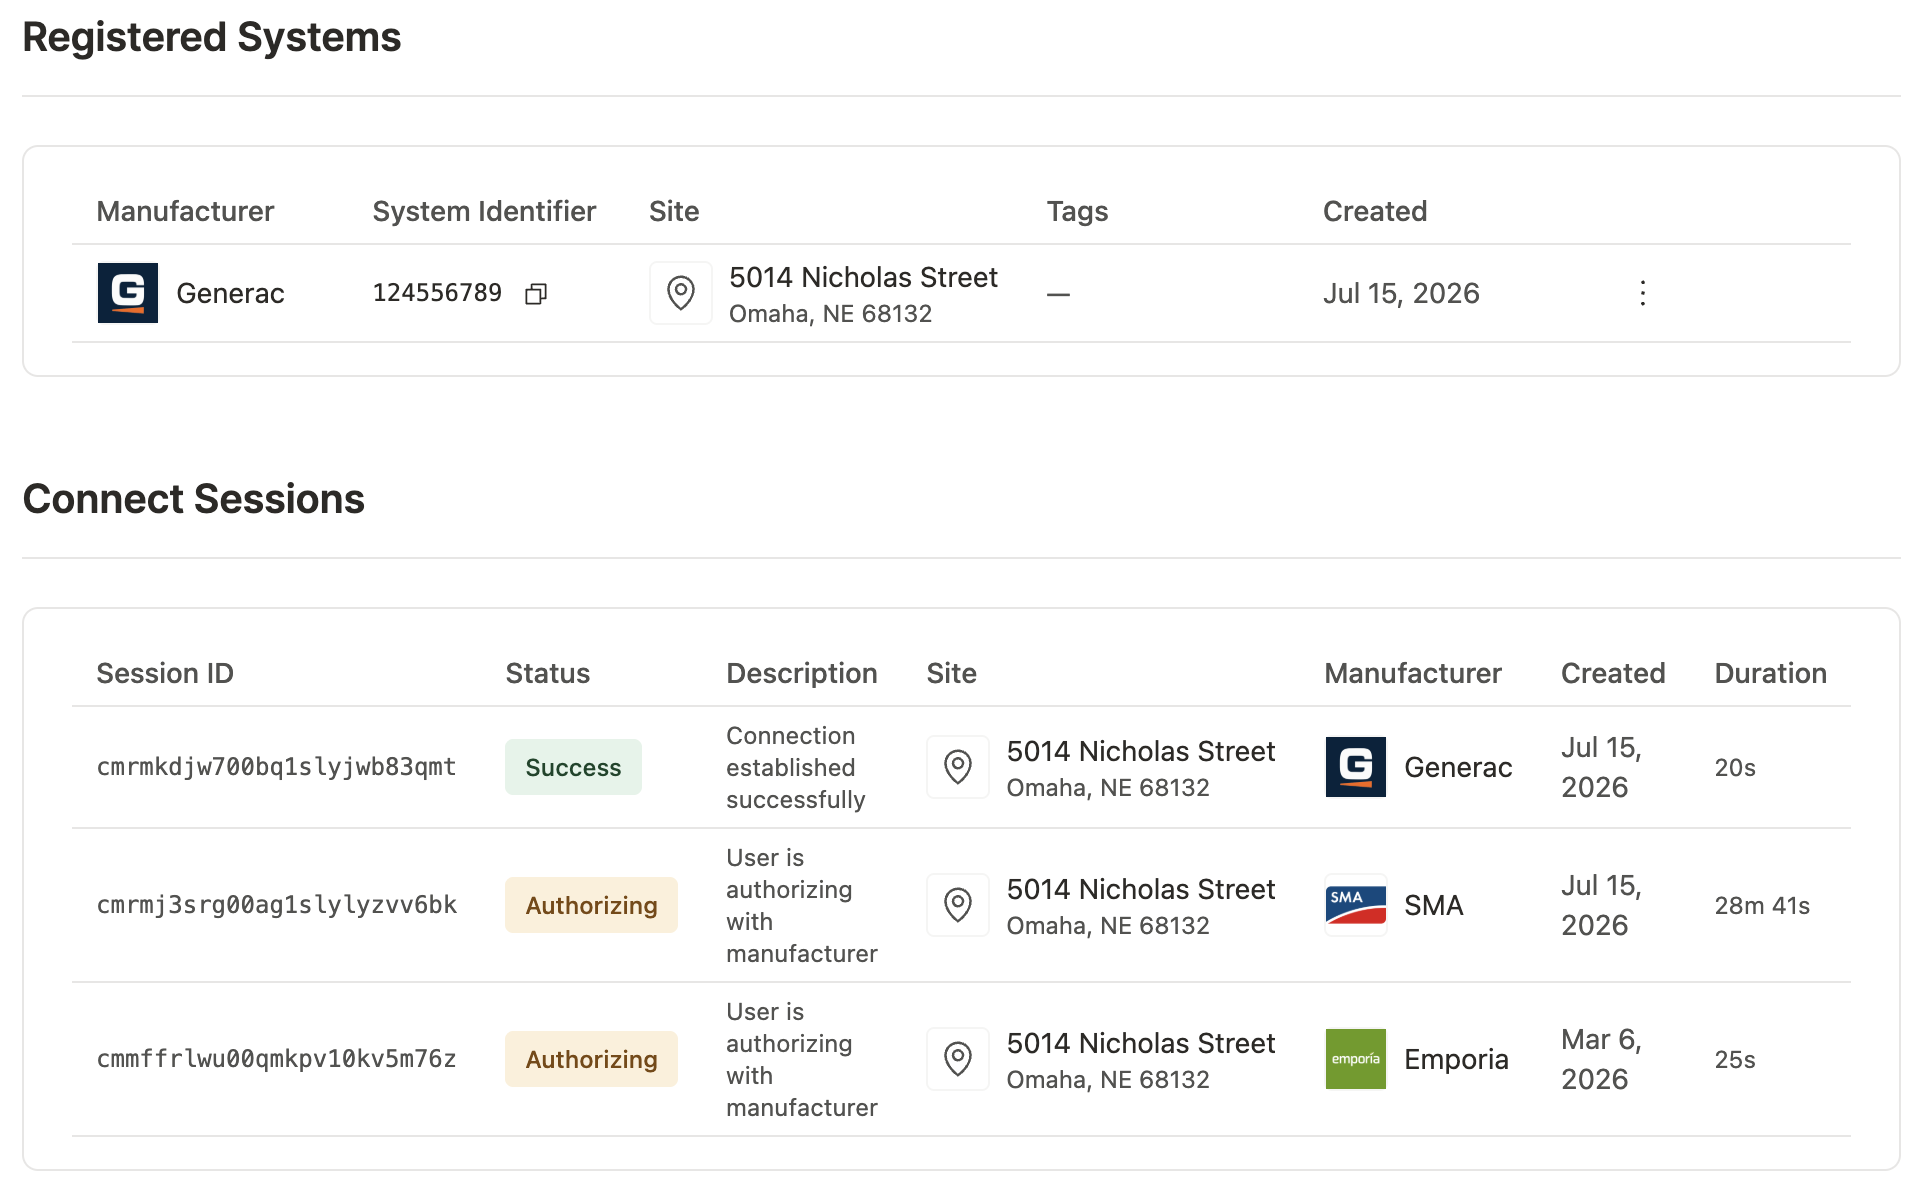
You can track progress from the Connect screen. Each link shows a status — such as authorizing or success — and you can click in for more detail on where a customer is in the flow.
Connect Links are monitoring-only. Connecting a device this way grants read access to device data only. No device control (like grid services dispatch) happens until the customer separately completes program enrollment.